Cooking in college can be daunting. The Bruin Gastronomer aims to give students the knowledge and tools to cook affordable, simple and delicious meals that will fill brains and bellies alike.
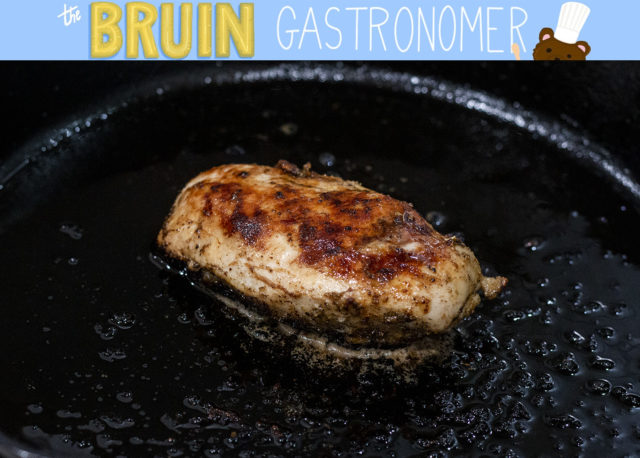
Seared Butter-Basted Chicken
Chicken is a college student classic. There are endless meals that can pair well with this cheap, filling and convenient poultry.
Students’ first instinct when cooking chicken is most likely to use the stovetop, which is called pan-searing. However, with a slight refinement of preparation, pan-searing can produce juicy and tender chicken rather than rubber.
There’s a crucial step most students haven’t heard of: dry brining. Essentially, dry brining involves pre-salting your chicken and letting it sit for ideally 24 hours but at least for one hour. This process tenderizes the meat and keeps moisture within the chicken – and can work for other meats as well.
Sure, the prospect of salting chicken ahead of time may seem like a hassle, but I promise it’s not.
If you buy a five-pack of chicken breasts for the week, put three in the freezer and the remaining two in the fridge. Salt one breast for the following night. Repeat the night-before salting process for your next chicken meal, and move one of the other breasts from the freezer to the fridge to thaw. This rotation system is a simple routine for busy students who are planning ahead.
Ingredients
1 or 2 chicken breasts, boneless
2 tablespoons of canola, coconut or vegetable oil
1 or 2 tablespoons of butter for basting (depending on the number of breasts you cook)
Kosher salt
Whatever herbs and spices you have on hand (black pepper, thyme, oregano, paprika, cayenne pepper, garlic powder, etc.).
Kosher salt, as I’ve mentioned before in this series, is crucial for cooking and especially for brining chicken because the crystal sizes are just right for penetrating the meat.
The cheapest chicken breasts can be found at the store for $2 to $3 per pound.
When buying chicken, never buy frozen chicken; the more times chicken is frozen, the worse the meat will become. If you do plan to freeze chicken for future days, it’s best to buy fresh instead of pre-frozen poultry to maintain quality.
If your chicken is frozen before you begin cooking, there are ways to thaw the chicken – some faster than others. Generally, I place my breast in a plastic bag and submerge it in a bowl of cold water for a couple of hours, changing the water every 30 minutes or so.
You may think to wash your chicken before cooking. Do not do this, as you could spread harmful and unsanitary parts of the chicken over your sink and around your kitchen.
Instructions
- Salt your thawed chicken for dry brining. When salting a breast, you want the entire surface of the breast covered with crystals – bottom, top, edges and all. Perhaps you’re worried about oversalting, but not only is that harder than you think, it’s also not likely when using kosher salt.
- Place the chicken in an open container and leave it in the fridge until you’re ready to cook it.
- Take the chicken out of the fridge 15 to 20 minutes before you begin cooking. This will prevent any overcooking that may occur if the breast is thrown in the pan right from the cold fridge.
- Sprinkle your favorite herbs and spices on the chicken.
- Use a low, wide – not nonstick – pan, like a cast-iron skillet, if you have one and set the heat to medium-high. A nonstick pan won’t capture enough heat to cook chicken.
- After your pan is heated, which should be about 1 to 2 minutes, add your oil and let it heat up for 30 seconds to a minute. Swirl the pan to make sure the oil coats the whole bottom.
- Place your chicken breasts in the pan and let cook for 7 to 10 minutes. Do not touch your chicken during that time. The cooking time varies by the pan, heat and size of the breast. Generally, when looking at the side of the breast, when the white line indicating the chicken is cooked rises halfway up the breast, it’s ready to flip.
- When the time has passed, flip the chicken breasts to the other side. If you go to flip the chicken breasts and they seem to be stuck, they’re probably not ready to flip yet.
- Toss in 2 tablespoons of butter into the pan. When the butter melts, spoon this over the chicken, making sure the butter coats the breast as much as possible. This is called basting. Feel free to add more oil to the pan if needed.
- Chicken should reach 165 F for at least 15 seconds for the meat to cook through. If you don’t have a kitchen thermometer, which I imagine most students don’t, you can cut the chicken open when you think it’s done and check. If there is a pink hue, it needs more time.
- When the chicken is ready, remove it from the pan and let it rest for about 2 to 3 minutes for the juices to settle. Then enjoy!
